Help4 Commerce Getting Started
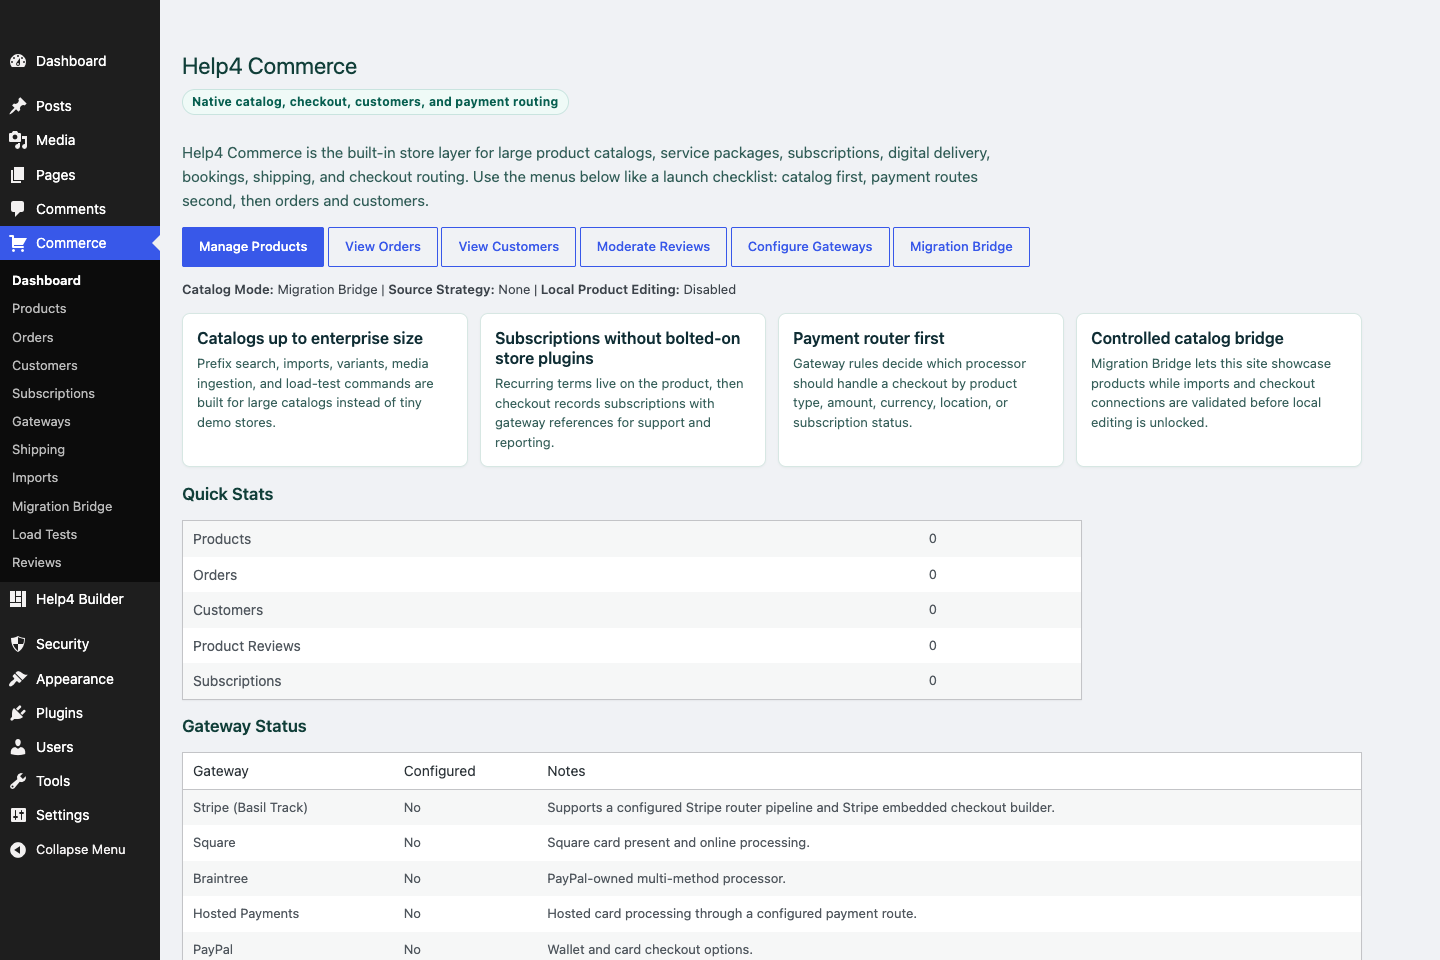
Commerce dashboard
Review products, orders, customers, subscriptions, gateway routing, imports, and migration tools from one commerce hub.
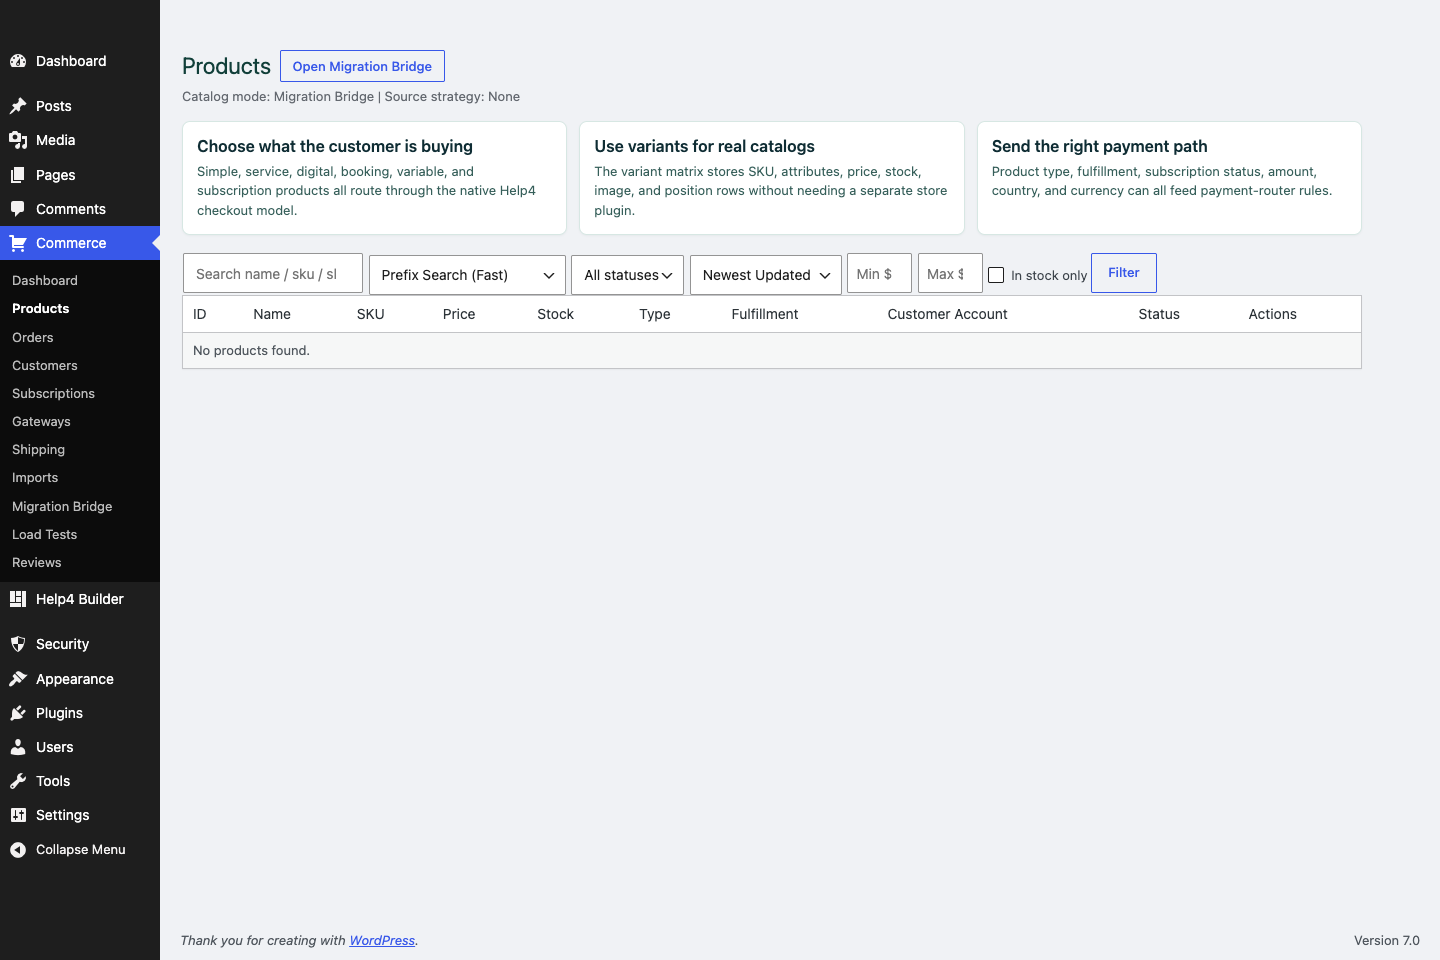
Commerce products
Create products, variations, subscriptions, product images, catalog fields, and checkout context.
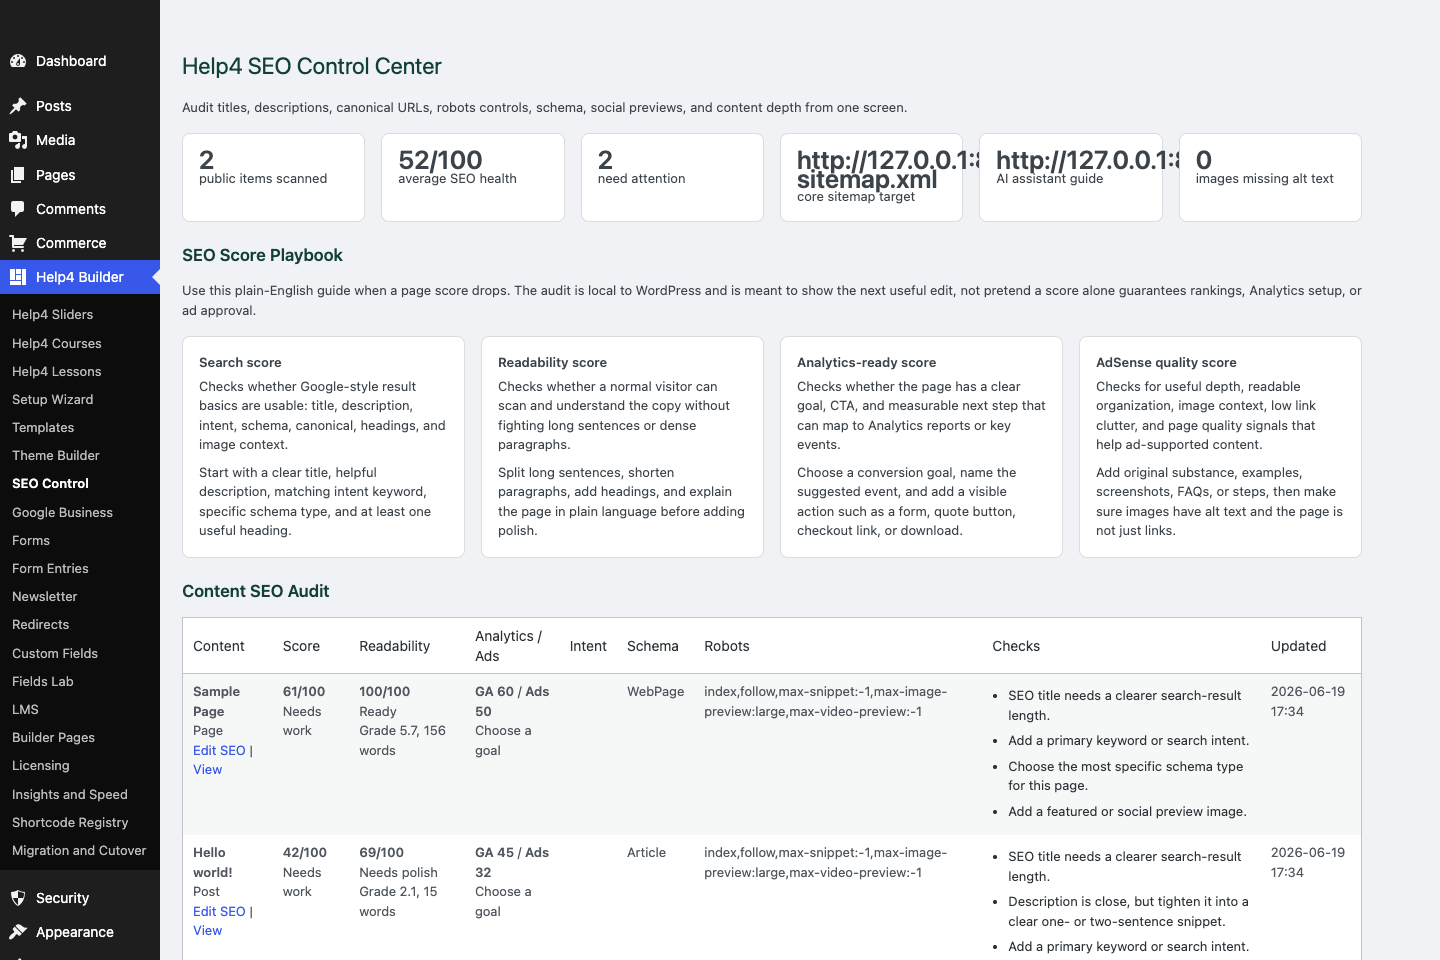
SEO control
Check titles, descriptions, canonical URLs, schema, readability, AdSense-style quality, Analytics intent, and launch signals.
Commerce path
Build commerce around catalog data first, then checkout.
A store only works when product data, variations, subscriptions, checkout routing, emails, support, and order status all agree.
Catalog first
Good commerce starts with product data, not a pretty checkout button.
Routing second
Payment rules should follow product, subscription, customer, and processor reality.
Support always
Customers need receipts, statuses, policies, and a clear help path.
Step
Choose the product model
Simple products, variations, subscriptions, digital goods, service packages, and imports need different defaults.
Step
Clean catalog fields
Titles, SKUs, descriptions, images, categories, prices, stock, variation labels, and subscription terms must be consistent.
Step
Set payment routes
Use routing rules when products, subscriptions, regions, or processor fallbacks need different payment paths.
Step
Test checkout context
Checkout should know product, variation, subscription, customer, price, tax/shipping needs, and return path.
Step
Add trust signals
Policy links, support links, SSL, security headers, reviews, FAQs, and fulfillment notes reduce confusion.
Step
Load-test big catalogs
Large stores need import checks, search checks, image checks, cache checks, and admin edit checks.
Start here
Install and setup
Download the ZIP, activate Builder Suite, understand the blank-theme path, and run the first clean check.
First page
Build a page safely
Open Builder Pages, launch Studio, build structure first, check mobile, then publish or hand it to Help4.
Templates
Choose a starter
Pick a starter spec by page job: service, product, support, recent work, local SEO, launch, or checkout recovery.
Theme layer
Headers and footers
Use Theme Builder for global headers, footers, 404s, page shells, canvas pages, popups, and conditions.
Fields
Structured content
Use fields when content repeats: FAQs, service areas, specs, team members, galleries, relationships, and product data.
Commerce
Products and payments
Plan catalog data, variations, subscriptions, checkout context, and payment routing before launch.
Capture leads
Forms and sliders
Use forms and motion only where they support the page goal and do not load extra assets everywhere.
Launch QA
SEO, speed, security
Check metadata, schema, readability, AdSense-style quality, Analytics intent, SSL, headers, images, and mobile.
Proof
Website Snapshot
Turn public URLs into safe website screenshots for recent work, migrations, support notes, and launch recaps.
Release safety
Updates
Use stable live packages and md beta testing to keep Builder Suite ready for the next WordPress line.
Need help with this step?
Send Help4 the page, screenshot, or site goal.
Include the URL, what you are trying to build, what looks wrong, and whether this is a draft, staging site, or live customer page.