
Help4 Theme Builder Guide
Start with one complete task
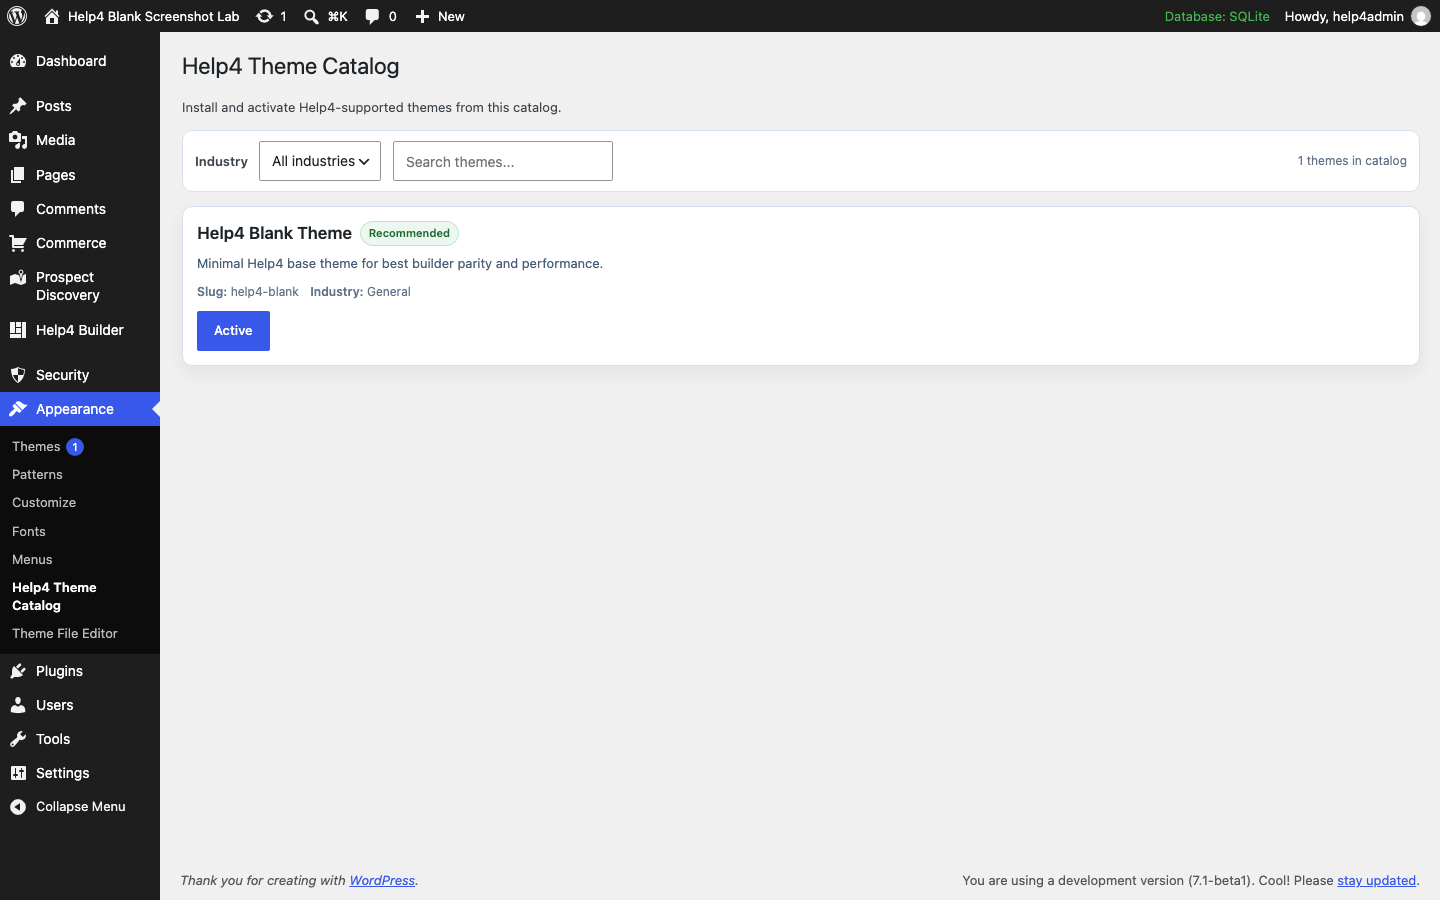
Set up Blank, a shared header and a shared footer
The clean theme supplies the shell while Builder templates supply the site header and footer, with deliberate display conditions.
Go to the stepsFind another tutorial
Before you begin
On an existing website, use a recoverable staging copy before changing the active theme. Builder is a plugin; Help4 Blank is a separate theme. Installing either is not a content migration.
See the controls before you start
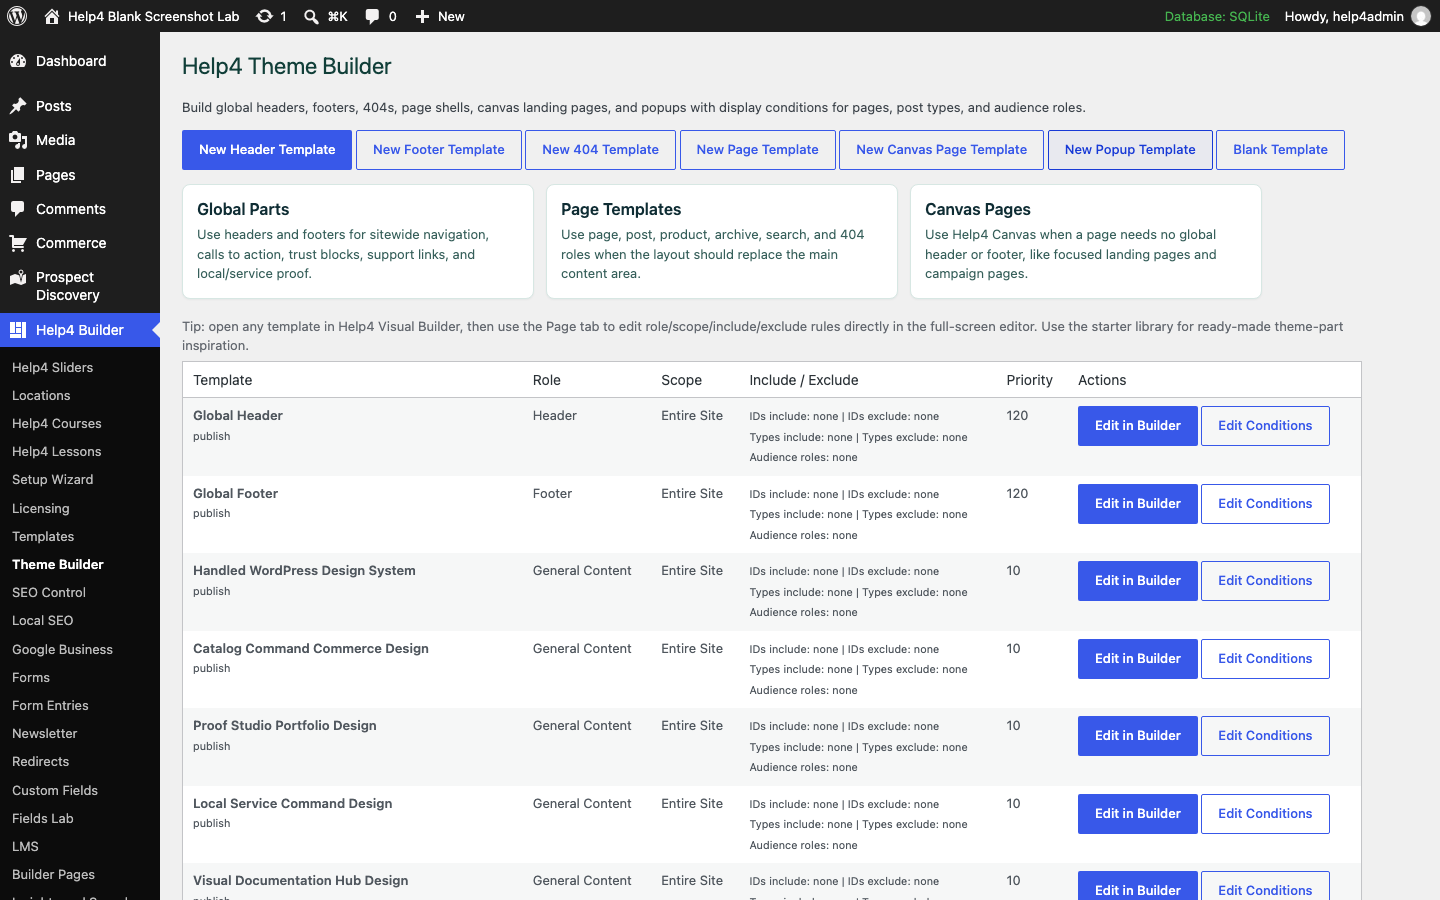
These are real blank-install documentation captures from August 2026, not generated interface pictures. The current editor may arrange controls differently; match the selected item and task, not the old button position.
Follow these steps in order
-
Keep plugin and theme installs separate
Install Builder through Plugins > Add New > Upload Plugin. If you want the clean companion shell, download Help4 Blank and install it through Appearance > Themes > Add New > Upload Theme.
Check before continuing: WordPress lists Builder under Plugins and Blank under Themes.
-
Activate the theme only when ready
Review the staging homepage, menus and existing templates before activating Blank. Keep the former theme available for rollback. Blank is intentionally not the Help4WordPress marketing-site design.
Check before continuing: The clean shell appears without importing customer-specific design.
-
Open Theme Builder
Open Help4 Builder > Theme Builder. Start a Header template and give it a name staff can recognize, such as Main site header.
Check before continuing: The template has a header role rather than an ordinary page role.
-
Build the navigation structure
Add your logo and a Menu element. Select an existing WordPress menu and inspect parent/child items. Use the native mobile menu controls instead of drawing fake menu text.
Check before continuing: The logo remains correct and submenu links are actual links.
-
Set display conditions
Choose where the header should appear. Review exclusions and priority when another header exists. Saving a template alone does not mean it is assigned to every page.
Check before continuing: The intended pages use the header; excluded pages do not.
-
Create the footer separately
Create a Footer template with contact links and the business information you actually want to show. Choose an explicit column count for occupied slots and check mobile stacking.
Check before continuing: The footer does not contain an accidental extra column or clipped text.
-
Test desktop and mobile interactions
On a public test page, open a dropdown, move into it and follow a child link. On mobile, open and close the menu and check that the button has a readable accessible name.
Check before continuing: Links stay reachable; the menu neither overlaps nor forces horizontal scrolling.
-
Reuse, then verify a second page
Save templates and visit at least two assigned pages plus one excluded page. Make one small template edit and confirm it appears everywhere intended.
Check before continuing: Shared structure updates without replacing individual page content.
If the result does not match
If two headers appear, check the active theme shell, existing template assignments and competing header conditions. Do not hide a duplicate with a site-wide CSS rule before identifying its owner.
Next useful guides
Get Help4 BlankHeaders and navigationContinue to the full reference
Help4 Theme Builder Guide
Use Theme Builder to control global header/footer and reusable template parts across the site.
Global Header & Footer
- Create/update header and footer templates.
- Assign scope to entire site or specific page types.
- Use include/exclude rules for targeted pages.
Template Conditions
- Choose role: header, footer, section, popup.
- Set scope: entire site, include list, exclude list.
- Use priority values to resolve template conflicts.
Best Practice
- Keep header nav consistent and lightweight.
- Use reusable templates for repeated sections.
- Verify each template at desktop and mobile breakpoints.
Build A Site Shell In The Right Order
Start with the global header and footer because those parts frame every normal page. Add the logo, navigation hierarchy, contact route, primary call to action, legal links, and customer support path before creating special page exceptions. Then build a default page shell, a canvas landing-page shell, a 404 template, and any archive or single-content layouts the site actually uses.
- Create each reusable template and give it a name that explains its role.
- Assign the normal header and footer to the entire site.
- Add narrower include rules only for pages that truly need a different shell.
- Use exclusions for checkout, funnels, or canvas pages that intentionally remove normal navigation.
- Set priorities only when two valid rules can match the same request.
Menus, Dropdowns, And Mobile Navigation
Use the real WordPress menu hierarchy for parent and child links so desktop dropdowns and the mobile menu share one source. Test the pointer path from a parent item into its submenu, keyboard focus, touch opening, menu close behavior, and the space between the trigger and submenu. A dropdown should not disappear while the visitor is moving toward it.
Before Publishing A Template Change
Preview the homepage, one normal page, one long page, one conversion page, and the 404 route. Check desktop and phone widths for clipped content, duplicate headers, missing footers, unreadable contrast, broken fixed positioning, and links hidden behind the mobile menu. Clear page/CDN caches only after the saved template and assignment rules are confirmed.
Troubleshooting
If a template does not appear, confirm it is published, its role is correct, and its include/exclude rules match the current URL. If two templates appear, review overlapping conditions and priority values. If the canvas has a white frame, inspect the page layout and HTML block wrapper controls for background and padding before adding site-specific CSS.