
Help4 WordPress Security Hardening Guide
Before changing settings
Confirm the site, user state, current version, and recovery path.
Open the exact site and feature named in the request, record its current behavior, and keep a bounded recovery option. Change one setting group at a time so the verification can identify what actually changed.
Target
Record the domain, URL or admin screen, user role, viewport, and specific outcome before changing configuration.
Current state
Capture the relevant version, enabled module, existing value, and a fresh public or runtime check.
Recovery
Keep the previous immutable package, WordPress revision, export, or narrow data snapshot needed for this feature.
Privacy
Keep credentials, private customer data, payment secrets, nonces, and protected files out of screenshots and support reports.
Visual orientation
Match the screen before following the steps.
Open each image at full size. The numbered notes explain what the screen controls and what to confirm before changing customer content.
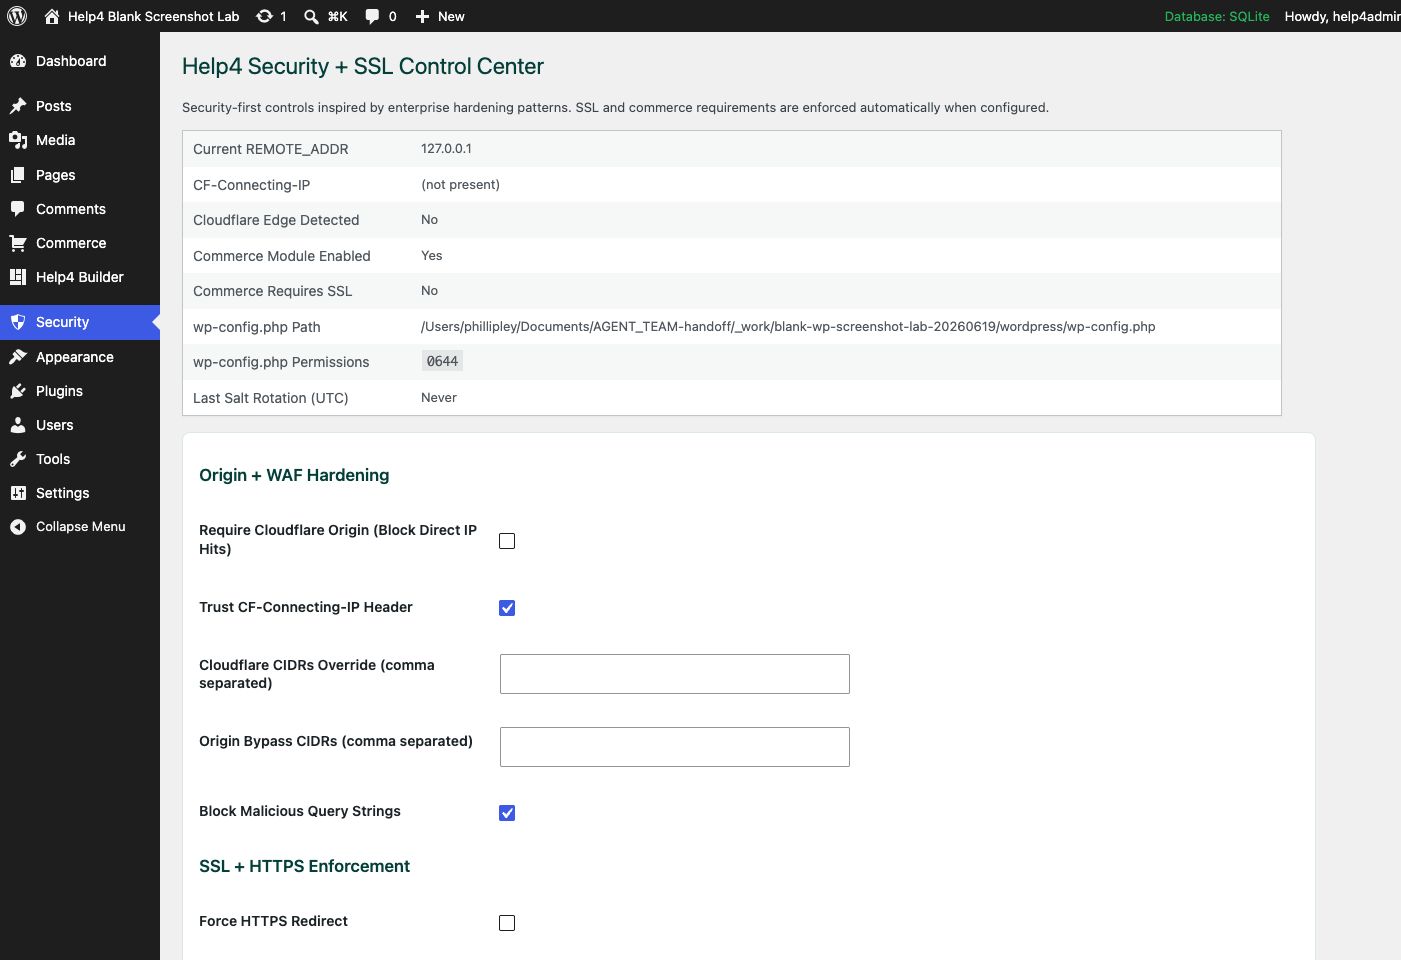
Screen 1
Security
Review SSL, headers, login hardening, XML-RPC controls, checkout safety, and production hardening settings.
Confirm: the page title, selected item, plugin version, and intended responsive view match the task.
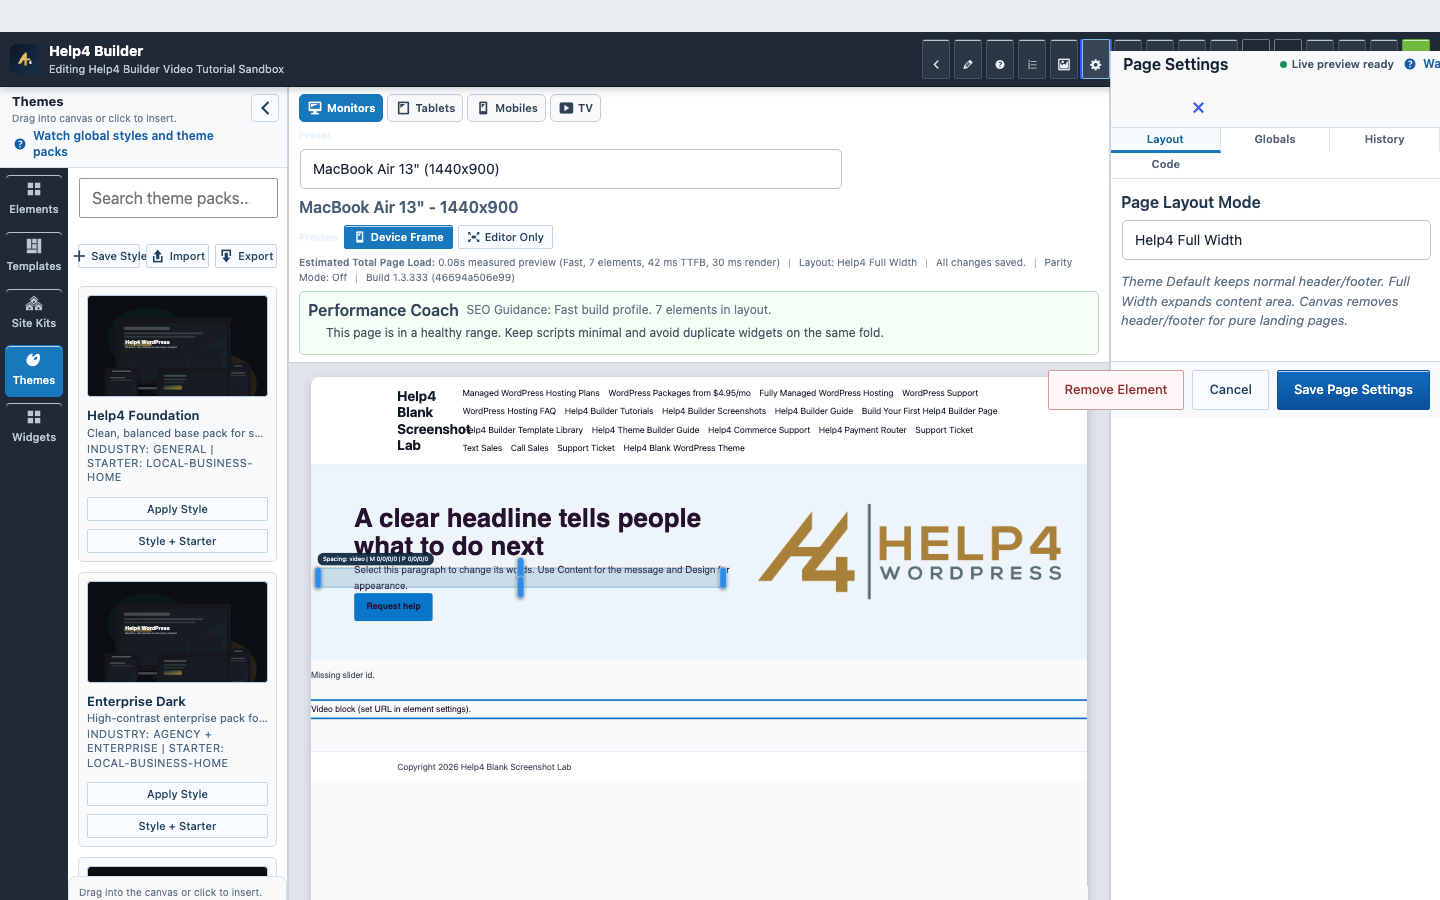
Screen 2
Page Settings and recovery
Confirm page-level layout, history, preview, and recovery controls before a larger edit.
Confirm: the page title, selected item, plugin version, and intended responsive view match the task.
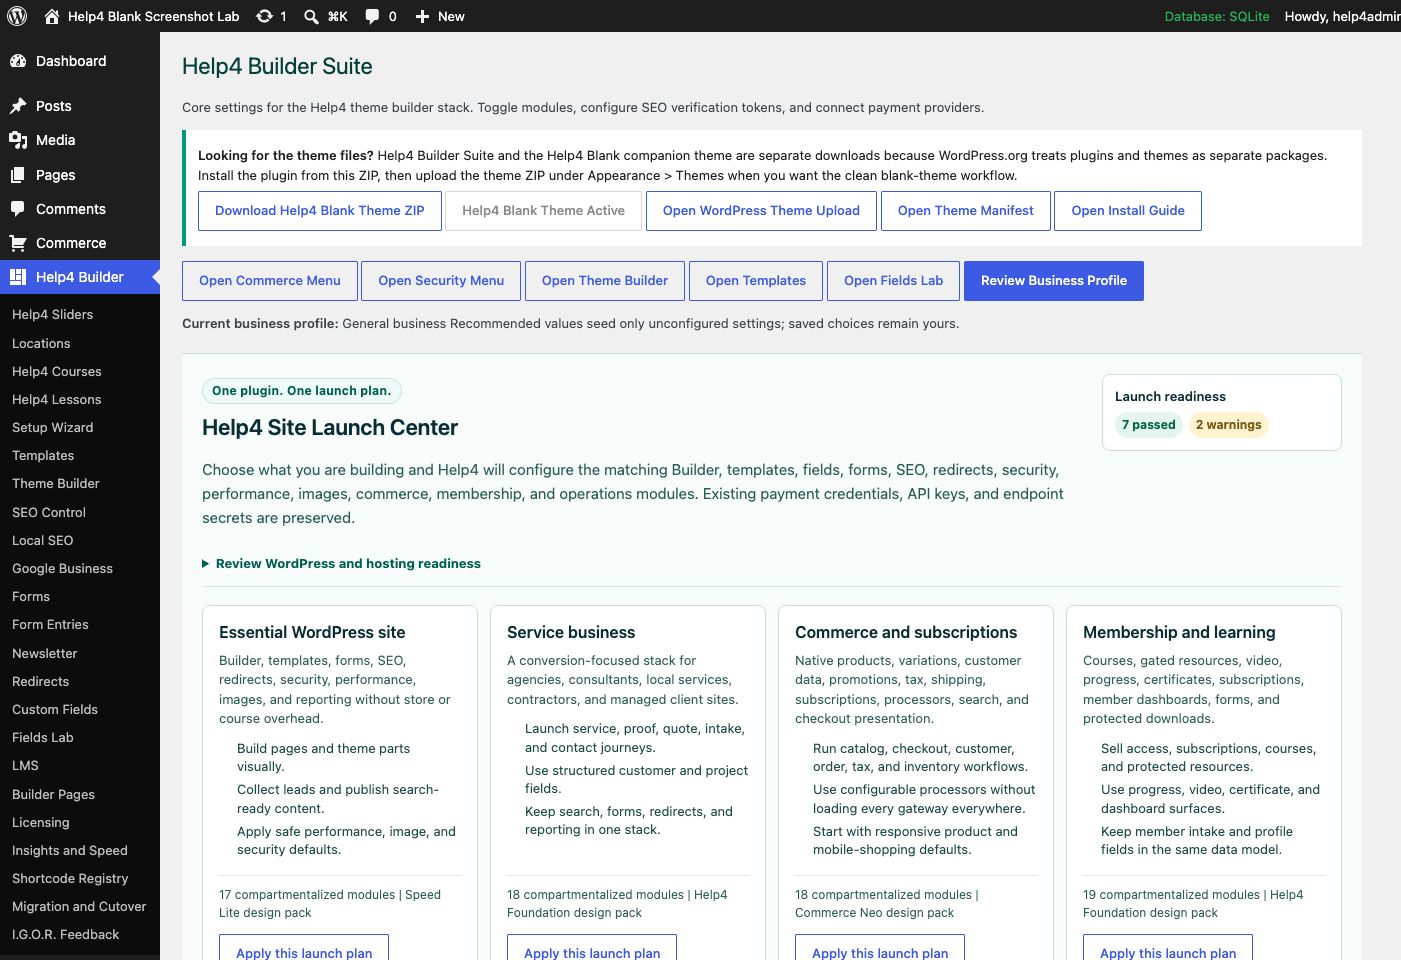
Screen 3
Settings and launch center
Choose a launch plan, confirm modules, download Help4 Blank, review readiness, and keep the site configuration in one place.
Confirm: the page title, selected item, plugin version, and intended responsive view match the task.
Watch the real workflow
Watch the clicks before making the change.
Use the narrated walkthrough first, then follow the written steps and verification checks on this page.
Lesson 46
WordPress Security Hardening and Recovery Access
Apply evidence-based hardening without locking out administrators, breaking trusted proxies, or losing the recovery path.
Read the complete transcript
- Review Current Risk
Open Security and review HTTPS, headers, login protection, proxy trust, file permissions, user roles, update state, secrets, exposed routes, commerce data, and fresh logs. A warning is a starting point for verification, not permission to turn on every control at once.
- Confirm Dependencies
Record the WordPress, PHP, database, plugin, theme, web server, cache, proxy, CDN, and authentication path before changing enforcement. Trust only known proxy headers and addresses. Test the real administrator route and public origin so a header or redirect change does not create a loop or hide the actual client address.
- Keep Recovery Available
Maintain a verified database and file recovery point, the prior immutable package, and an out-of-band way to disable the affected module if administration fails. Builder page history can recover content structure, but it does not replace a complete site backup for plugin, database, user, or server changes.
- Apply and Regression Test
Make one bounded change, then test anonymous pages, login, logout, password reset, administrator access, REST routes, forms, uploads, cache behavior, checkout, webhooks, scheduled jobs, and fresh logs. Use I.G.O.R. to record the exact failure and evidence instead of weakening broad controls without knowing which rule caused the problem.
Lesson 26
Navigator, Layers, and Reusable Sections
Read the complete transcript
- Read the Element Tree
Open Navigator when the canvas is crowded or an element is hard to click. Read the parent, slot, and child relationships before moving anything. Select the exact heading, image, button, column, or section by name so a small content update never removes the surrounding page structure.
- Name Important Layers
Give major sections and reusable elements descriptive names. Names such as Home Hero, Pricing Grid, or Contact Button make later support and team editing much safer than a long list of generic sections. Keep stable element identifiers when replacing content so responsive values and extension data remain connected.
- Reuse the Right Structure
Use a section or page template when the same structure belongs in several places. Insert a reviewed starter, then replace its sample copy, media, links, and accessibility text. Reuse should reduce repeated work without turning every page into an identical block of unrelated content.
- Manage Shared Templates
Use Builder Templates and Theme Builder for headers, footers, page shells, archives, search, 404 pages, and other shared layouts. Confirm the role and display conditions before publishing. A shared template change can reach many routes, so test one matching and one nonmatching page before completing the update.
Safe hardening
Know the recovery path before tightening the control.
Security settings must match the real hosting, proxy, commerce, API, and administrator paths; copying an aggressive preset can cause an outage without reducing the actual risk.
Recovery access
Keep one verified administrator and hosting recovery path outside the rule being changed.
HTTPS truth
Confirm the certificate, canonical host, forwarded protocol, mixed content, and checkout transport before enabling HSTS.
Proxy identity
Trust forwarding headers only from documented proxy ranges so visitor identity cannot be forged.
Functional regression
Retest login, forms, REST, cron, updates, checkout, webhooks, media, and Builder Studio after each change.
Guided walkthrough
Make one verified change at a time.
Each step includes the action, why it belongs in this order, and the checkpoint to verify before moving forward.
-
Record the current access path
Verify WordPress admin, hosting control panel, file access, and a rollback path before changing a security control.
Why nowStarting from a confirmed target prevents a correct edit from being applied to the wrong page, template, product, or responsive view.
Done whenThe record the current access path result is visible, remains after reselecting the item, and has not changed unrelated content or styling.
-
Confirm SSL and canonical host
Test HTTP to HTTPS, www or apex behavior, certificate names, mixed content, and logged-out checkout before HSTS.
Why nowCompleting and checking this step creates a known-good checkpoint before the next control changes the page state again.
Done whenThe confirm ssl and canonical host result is visible, remains after reselecting the item, and has not changed unrelated content or styling.
-
Review login and XML-RPC needs
Set bounded login attempts and disable XML-RPC only when no required publishing or integration workflow depends on it.
Why nowCompleting and checking this step creates a known-good checkpoint before the next control changes the page state again.
Done whenThe review login and xml-rpc needs result is visible, remains after reselecting the item, and has not changed unrelated content or styling.
-
Configure headers gradually
Enable security headers one group at a time and use a report-first content security policy before enforcement.
Why nowCompleting and checking this step creates a known-good checkpoint before the next control changes the page state again.
Done whenThe configure headers gradually result is visible, remains after reselecting the item, and has not changed unrelated content or styling.
-
Validate proxy and origin rules
Enter only current trusted proxy ranges and verify direct-origin restrictions do not block required health or management paths.
Why nowCompleting and checking this step creates a known-good checkpoint before the next control changes the page state again.
Done whenThe validate proxy and origin rules result is visible, remains after reselecting the item, and has not changed unrelated content or styling.
-
Check files, salts, and commerce
Review configuration permissions, salt-rotation recovery, secure cookies, and forced SSL for payment and customer actions.
Why nowCompleting and checking this step creates a known-good checkpoint before the next control changes the page state again.
Done whenThe check files, salts, and commerce result is visible, remains after reselecting the item, and has not changed unrelated content or styling.
-
Run the functional matrix
Test anonymous, member, editor, administrator, form, checkout, webhook, cron, update, REST, and Builder paths plus fresh logs.
Why nowThe final verification separates an editor preview from a result that is actually saved, responsive, interactive, and ready for visitors.
Done whenThe run the functional matrix result is visible, remains after reselecting the item, and has not changed unrelated content or styling.
Release check
Test the real public or member outcome, not only the settings screen.
Reopen the saved setting, run the intended workflow in the correct visitor state, test desktop and phone behavior where a frontend surface exists, and inspect fresh browser or PHP errors from the same attempt.
Persistence
The saved values remain correct after reload and do not overwrite newer settings from another session.
Public behavior
The intended visitor can complete the workflow and an unintended visitor cannot access protected output.
Responsive behavior
Controls, text, tables, media, dialogs, and focus stay visible and usable at 768px, 390px, and 360px.
Fresh evidence
The final request has the expected status, output, cache state, and no new related console or PHP error.
Common questions
Answers for the decisions that block this setup most often.
Should HSTS be enabled before HTTPS is fully correct?
No. Verify the certificate, canonical host, redirects, subdomain scope, and all required HTTPS routes before telling browsers to enforce HTTPS.
Can every site disable XML-RPC?
No. Disable it only after confirming that no mobile publishing, remote management, or integration workflow still requires it.
Why test Builder Studio after hardening?
Builder save, preview, REST, media, and AJAX requests can reveal an overly broad firewall or header rule that ordinary page views do not exercise.
Continue learning
Use the next guide that matches the work in front of you.
The full tutorial hub remains available without repeating dozens of unrelated cards on this page.
Start here
Install and setup
Download the ZIP, activate Builder Suite, understand the blank-theme path, and run the first clean check.
First page
Build a page safely
Open Builder Pages, launch Studio, build structure first, check mobile, then publish or hand it to Help4.
Editor controls
Know which tab changes what
Use Content for information, Design for appearance and responsive values, and Advanced for identity, attributes, visibility, and motion.
Recovery
Edit without losing work
Replace media safely, recognize stale drafts, and restore a known-good page snapshot from Page Settings History.
Responsive
Control every viewport
Set spacing, widths, columns, alignment, and typography independently for desktop, tablet, and mobile.
Templates
Choose a starter
Pick a starter spec by page job: service, product, support, recent work, local SEO, launch, or checkout recovery.
Need a second set of eyes?
Send one complete, privacy-safe support record.
Include the affected URL or admin screen, current Builder version, user state, exact steps, expected result, actual result, and one screenshot or fresh error when available.