
Help4 Image Optimization and Image Studio
Before changing settings
Confirm the site, user state, current version, and recovery path.
Open the exact site and feature named in the request, record its current behavior, and keep a bounded recovery option. Change one setting group at a time so the verification can identify what actually changed.
Target
Record the domain, URL or admin screen, user role, viewport, and specific outcome before changing configuration.
Current state
Capture the relevant version, enabled module, existing value, and a fresh public or runtime check.
Recovery
Keep the previous immutable package, WordPress revision, export, or narrow data snapshot needed for this feature.
Privacy
Keep credentials, private customer data, payment secrets, nonces, and protected files out of screenshots and support reports.
Visual orientation
Match the screen before following the steps.
Open each image at full size. The numbered notes explain what the screen controls and what to confirm before changing customer content.
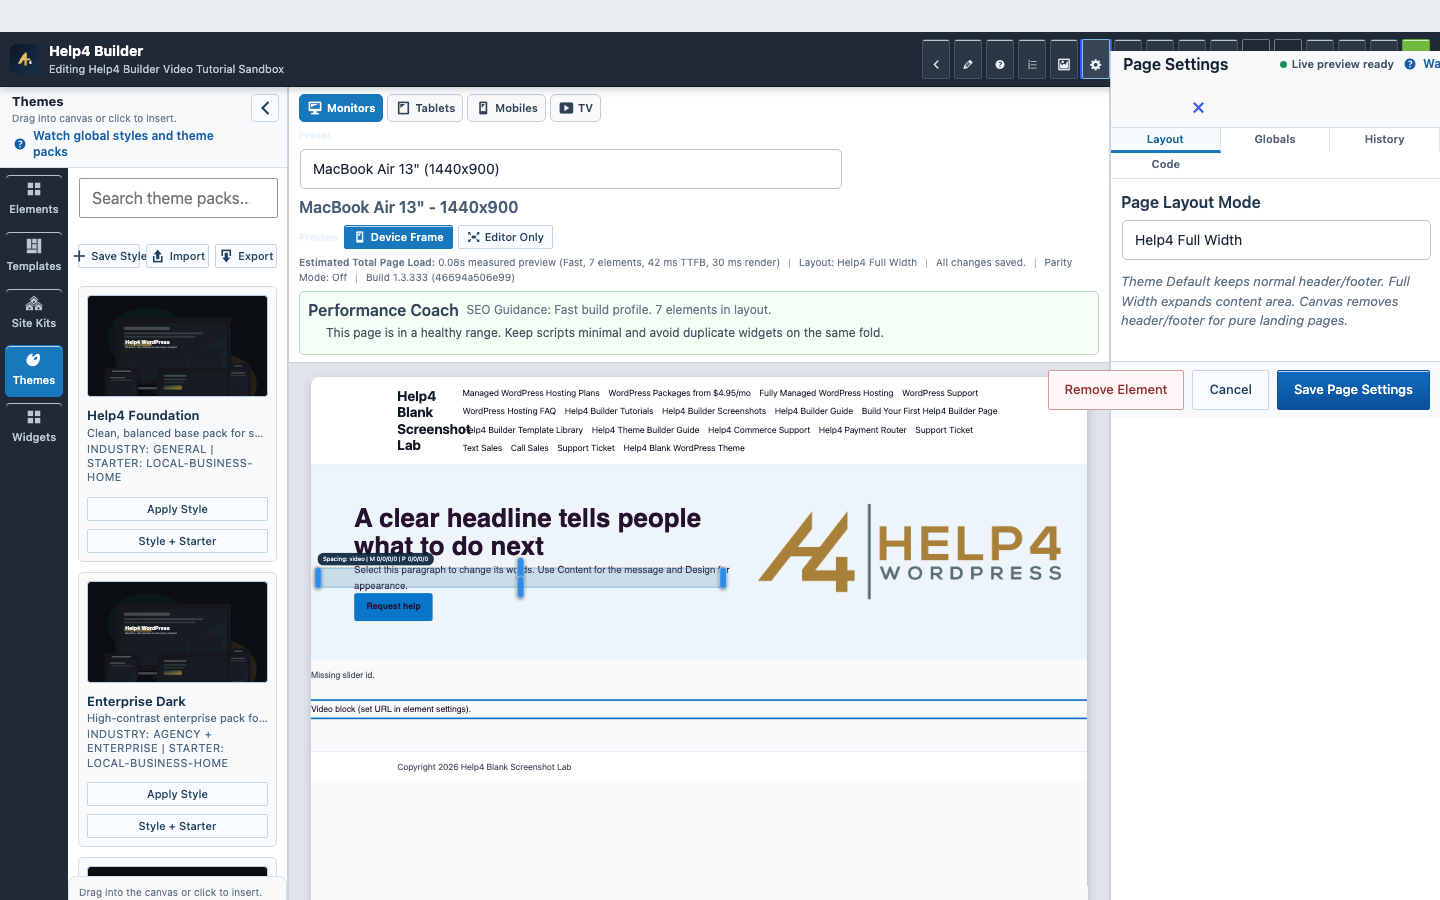
Screen 1
Page Settings and recovery
Confirm page-level layout, history, preview, and recovery controls before a larger edit.
Confirm: the page title, selected item, plugin version, and intended responsive view match the task.
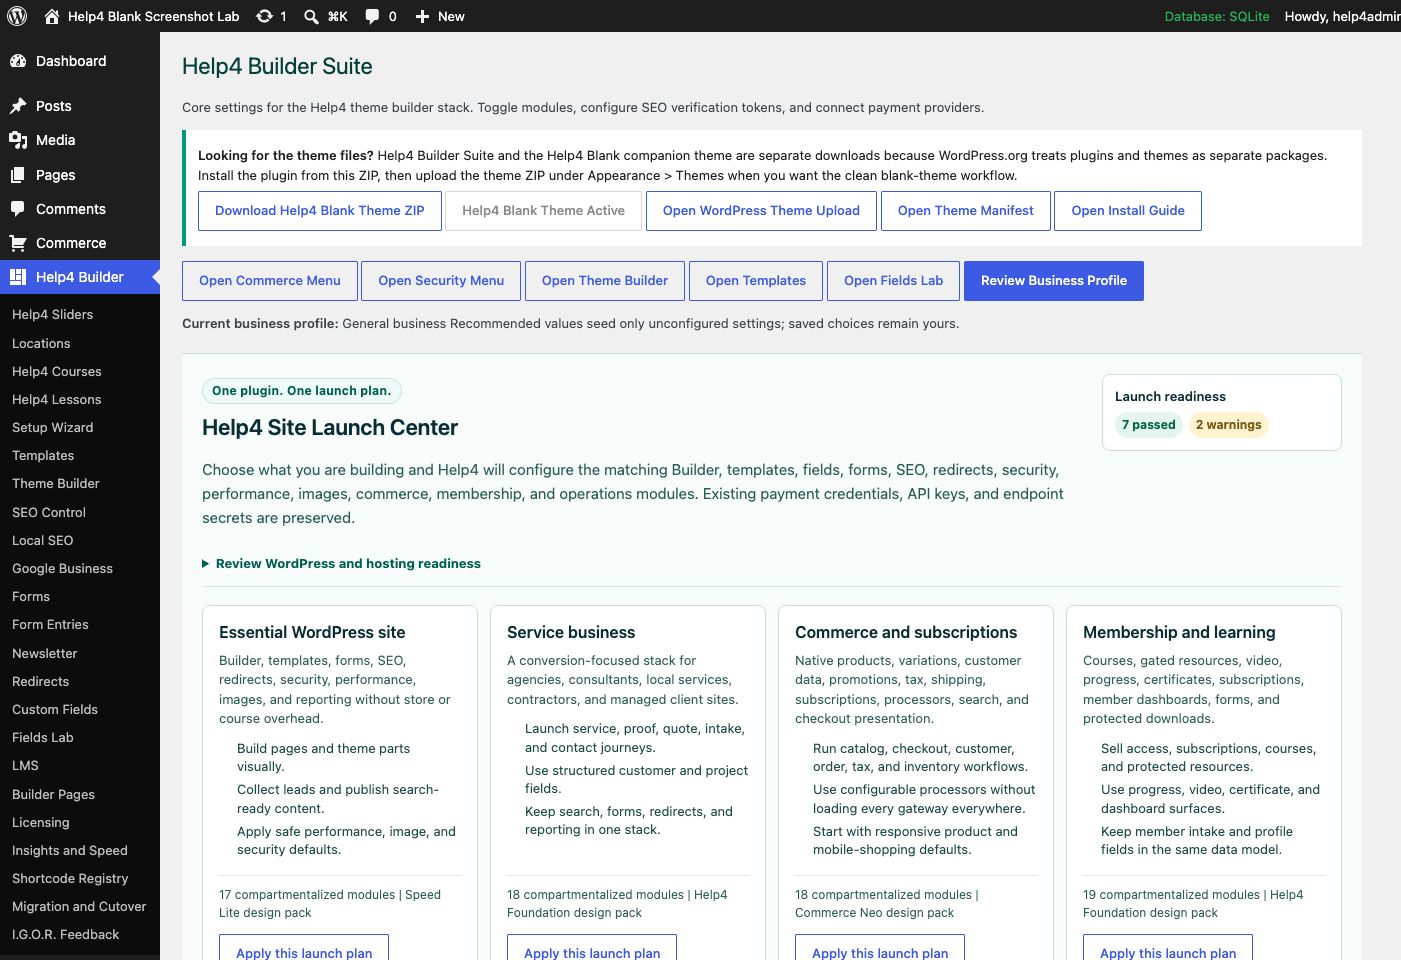
Screen 2
Settings and launch center
Choose a launch plan, confirm modules, download Help4 Blank, review readiness, and keep the site configuration in one place.
Confirm: the page title, selected item, plugin version, and intended responsive view match the task.
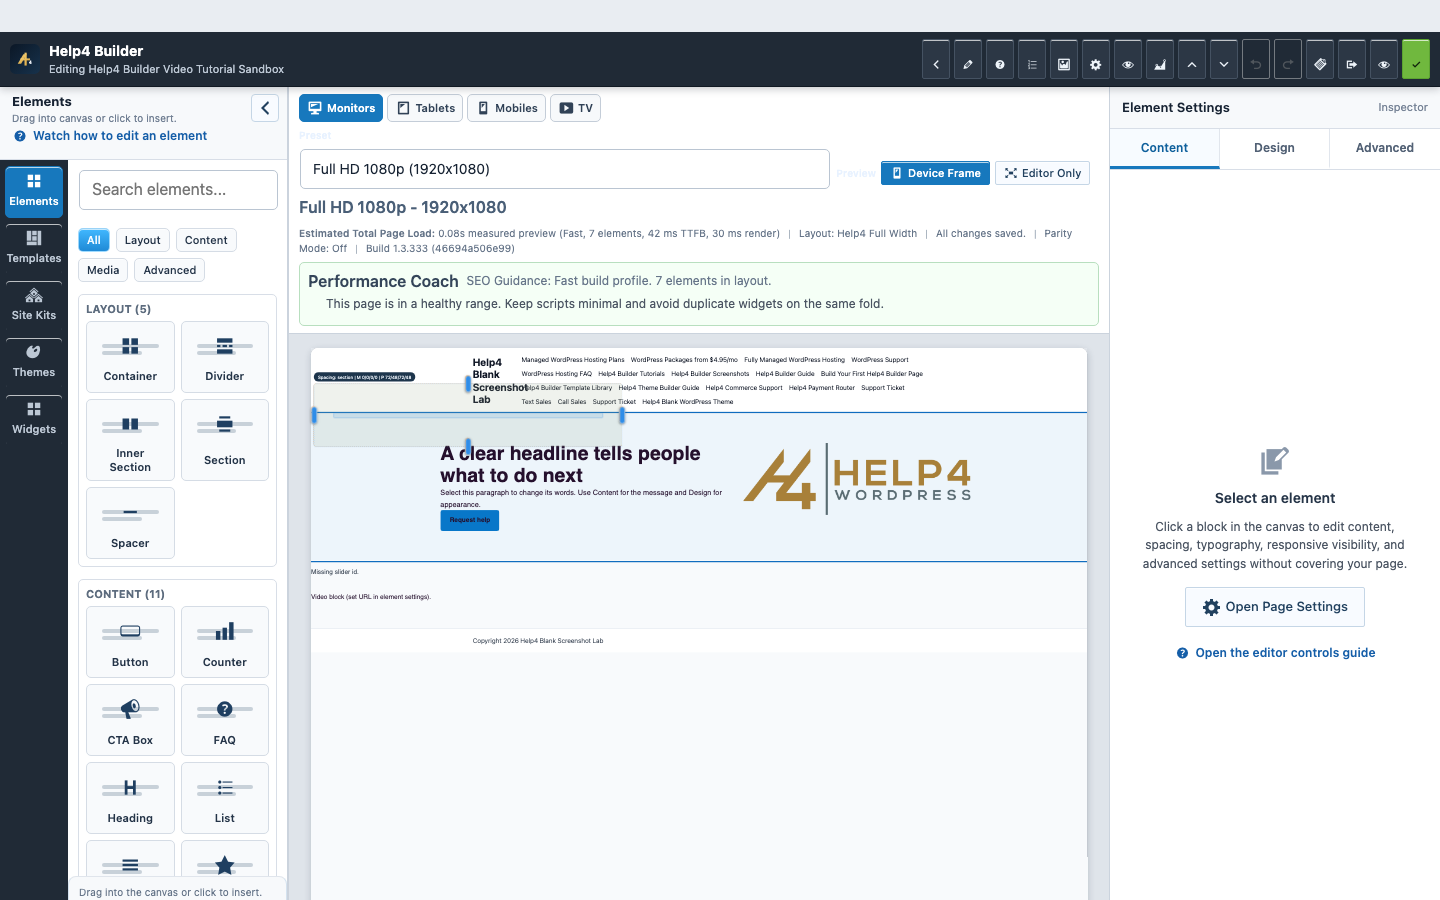
Screen 3
Current Studio workspace
See the element library, device controls, live page frame, inspector, performance guidance, and save state together.
Confirm: the page title, selected item, plugin version, and intended responsive view match the task.
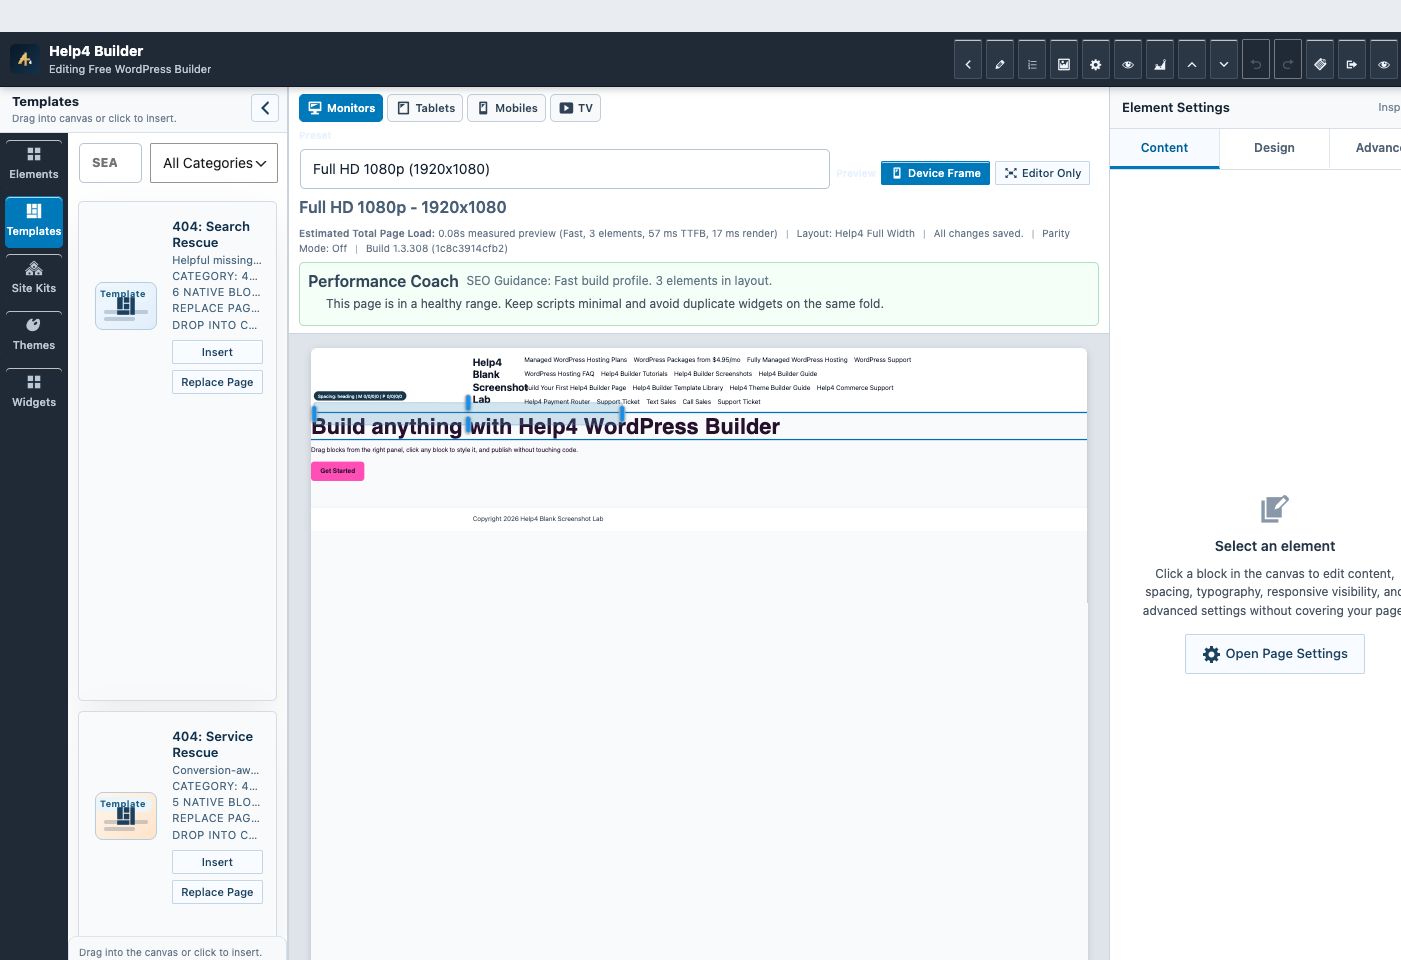
Screen 4
Builder Studio
Use the live page frame, element library, template library, inspector, responsive controls, performance guidance, and save state in one workspace.
Confirm: the page title, selected item, plugin version, and intended responsive view match the task.
Watch the real workflow
Watch the clicks before making the change.
Use the narrated walkthrough first, then follow the written steps and verification checks on this page.
Lesson 22
Images, Cache, Assets, and Performance
Optimize media and module loading, measure cold and warm requests, and improve speed without breaking interactive behavior.
Read the complete transcript
- Prepare the Media
Open Image Studio and inspect the original before generating a derivative. Choose dimensions, crop, quality, and modern formats for the actual placement. Preserve the approved original and metadata, then confirm the responsive source set does not substitute an unrelated image.
- Read the Performance Evidence
Open Insights and review versions, module health, page estimates, REST checks, shortcodes, and recent diagnostics. Measure a cold anonymous request and a warmed request separately. A fast cached page does not prove the origin, editor, checkout, or signed-in experience is healthy.
- Reduce Unused Work
Use Performance Coach and the page structure to remove duplicate widgets, oversized media, unnecessary sliders, and modules the page does not use. Keep module CSS and scripts scoped to the surfaces that need them, while preserving preview and public asset parity.
- Retest Interactions and Bypasses
After cache or asset changes, retest menus, forms, sliders, video, search, cart, checkout, account pages, preview, and save behavior at desktop and mobile. Confirm query, cookie, private, and transactional requests bypass public cache correctly, then inspect fresh browser and PHP logs.
Lesson 9
Forms, Lead Delivery, and Spam Protection
Create a form, add it to a page, configure delivery and consent, and test the full submission path.
Read the complete transcript
- Create the Form
Open Help4 Forms and create the form record first. Give it a clear internal name so editors can choose the correct form later without guessing.
- Place It on the Page
In Studio, insert the Form widget and select the saved form. Keep labels visible, mark required fields accurately, and use fields that match the actual follow-up workflow.
- Configure Delivery
Set the recipient, reply behavior, confirmation message, consent text, retention, and spam controls. Do not assume a form works merely because it looks correct.
- Submit a Real Test
Publish to the approved test page and submit from desktop and mobile. Confirm validation, success messaging, stored submission, notification delivery, and the reply path end to end.
Image decisions
Optimize for the rendered slot, not the largest file you can upload.
Preserve the original, edit a controlled derivative, describe meaningful images, and verify the browser receives an appropriate source at each viewport.
Source quality
Start from a clean original with enough resolution for the largest real display slot.
Crop and focus
Keep the subject visible at desktop, tablet, and mobile aspect ratios before publishing.
Meaningful text alternative
Describe the purpose of informative images and leave decorative images empty instead of stuffing keywords.
Delivery proof
Confirm dimensions, format, file size, lazy-loading behavior, and cache response on the public URL.
Guided walkthrough
Make one verified change at a time.
Each step includes the action, why it belongs in this order, and the checkpoint to verify before moving forward.
-
Inventory the rendered slot
Measure where the image appears and record the largest desktop width plus the mobile crop before editing the asset.
Why nowStarting from a confirmed target prevents a correct edit from being applied to the wrong page, template, product, or responsive view.
Done whenThe inventory the rendered slot result is visible, remains after reselecting the item, and has not changed unrelated content or styling.
-
Open the attachment
Use Media Library to confirm the file type, pixel dimensions, title, caption, description, and alternative text.
Why nowCompleting and checking this step creates a known-good checkpoint before the next control changes the page state again.
Done whenThe open the attachment result is visible, remains after reselecting the item, and has not changed unrelated content or styling.
-
Edit in Image Studio
Crop, rotate, draw, or apply an overlay only to a deliberate derivative and keep the original available for recovery.
Why nowCompleting and checking this step creates a known-good checkpoint before the next control changes the page state again.
Done whenThe edit in image studio result is visible, remains after reselecting the item, and has not changed unrelated content or styling.
-
Choose optimization settings
Enable optimization and WebP generation only after confirming the server supports the required image pipeline.
Why nowCompleting and checking this step creates a known-good checkpoint before the next control changes the page state again.
Done whenThe choose optimization settings result is visible, remains after reselecting the item, and has not changed unrelated content or styling.
-
Replace through the widget
Select the Image element in Builder, choose the intended attachment, and confirm the surrounding layout remains unchanged.
Why nowCompleting and checking this step creates a known-good checkpoint before the next control changes the page state again.
Done whenThe replace through the widget result is visible, remains after reselecting the item, and has not changed unrelated content or styling.
-
Check responsive output
Inspect desktop, tablet, 390px, and 360px for subject cropping, blur, stretching, oversized downloads, and layout shifts.
Why nowCompleting and checking this step creates a known-good checkpoint before the next control changes the page state again.
Done whenThe check responsive output result is visible, remains after reselecting the item, and has not changed unrelated content or styling.
-
Verify the public response
Publish, clear the relevant caches, then inspect the public image URL, responsive source selection, and broken-image state.
Why nowThe final verification separates an editor preview from a result that is actually saved, responsive, interactive, and ready for visitors.
Done whenThe verify the public response result is visible, remains after reselecting the item, and has not changed unrelated content or styling.
Release check
Test the real public or member outcome, not only the settings screen.
Reopen the saved setting, run the intended workflow in the correct visitor state, test desktop and phone behavior where a frontend surface exists, and inspect fresh browser or PHP errors from the same attempt.
Persistence
The saved values remain correct after reload and do not overwrite newer settings from another session.
Public behavior
The intended visitor can complete the workflow and an unintended visitor cannot access protected output.
Responsive behavior
Controls, text, tables, media, dialogs, and focus stay visible and usable at 768px, 390px, and 360px.
Fresh evidence
The final request has the expected status, output, cache state, and no new related console or PHP error.
Common questions
Answers for the decisions that block this setup most often.
Should every uploaded image be enhanced?
No. Enhancement is optional and should be used only when it improves a controlled derivative without changing brand assets or documented originals.
Does WebP replace the original file?
The safe workflow preserves the original attachment and creates optimized delivery formats or derivatives that can be regenerated.
What should decorative image alternative text contain?
Decorative images should normally use empty alternative text so assistive technology can skip them.
Continue learning
Use the next guide that matches the work in front of you.
The full tutorial hub remains available without repeating dozens of unrelated cards on this page.
Start here
Install and setup
Download the ZIP, activate Builder Suite, understand the blank-theme path, and run the first clean check.
First page
Build a page safely
Open Builder Pages, launch Studio, build structure first, check mobile, then publish or hand it to Help4.
Editor controls
Know which tab changes what
Use Content for information, Design for appearance and responsive values, and Advanced for identity, attributes, visibility, and motion.
Recovery
Edit without losing work
Replace media safely, recognize stale drafts, and restore a known-good page snapshot from Page Settings History.
Responsive
Control every viewport
Set spacing, widths, columns, alignment, and typography independently for desktop, tablet, and mobile.
Templates
Choose a starter
Pick a starter spec by page job: service, product, support, recent work, local SEO, launch, or checkout recovery.
Need a second set of eyes?
Send one complete, privacy-safe support record.
Include the affected URL or admin screen, current Builder version, user state, exact steps, expected result, actual result, and one screenshot or fresh error when available.